Thursday, April 25, 2013

Scheduling Repair Online

Did you know that you can schedule your repair directly from the Powell website?  If you haven't taken advantage of this very convenient option, you might want to try it the next time your flute needs repair.  The form is very user-friendly, and you can even choose the date you prefer on the calendar feature.  If you don't have a Powell flute, that is okay -- any flute can be sent in for repair here at Powell. 

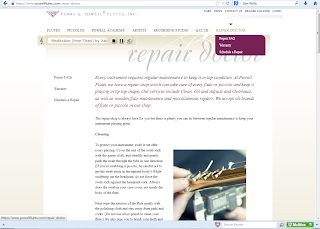
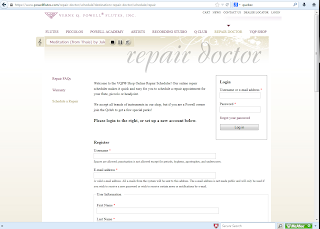
To get started, you'll want to go to our main webpage at www.powellflutes.com.  In the upper right-hand corner of the page, hover over "Repair Doctor" with your mouse, and you will see a drop down menu with the option to "Schedule a Repair."  Click on "Schedule a Repair."  You'll need to log in to your account from here, and you can create an account if you do not already have one.  Once you are logged in, you'll see the online repair form.  It's pretty straighforward and simple to complete.  You'll see prices for the services, and you'll also be able to choose a preferred date for service.  If the date you choose is unavailable, a message will appear on the calendar.  You can also add additional notes for our technician if there are specific items that need attention on your flute. 

Another option that you'll see on the form is a "rental instrument" to use while your flute is in the shop.  This is actually more of a "loaner flute" since Powell does not charge a rental fee for this instrument.  Most "loaner flutes" from Powell would be Signature flutes and sometimes Conservatory flutes.  A 2100 or 3100 may also be available as a loaner.  This is a nice option if you do not have a spare or back-up flute.  A C.O.A. will take about 2 weeks, and an overhaul will take 4 weeks -- so a loaner would certainly help out if you need one.  Our repair technician, Rachel, also reminded us that the day you request on the calendar for your repair is the day that the repair would begin -- so you'll definitely want to plan accordingly.  The schedule is closed during around the time of the NFA conference in August and also for one week in early July when our shop is closed for a summer break.

We do hope that you'll consider using the online form to schedule your repair.  It's quick and easy, and your form goes directly to the repair technician.  Also, one nice perk is that you will receive a 5% discount on accessory orders from the VQP shop when you schedule your repair.  Once your repair form is submitted, you'll get a confirmation e-mail with the discount code -- so feel free to take advantage of that.  Rachel says that she's happy to help get the accessories you order together and send them back with your freshly repaired flute!  Give it a try at https://www.powellflutes.com/repair-doctor/schedule?destination=repair-doctor/schedule/repair.

First screen to start the process. 
Next screen after "Schedule a Repair" is selected.
Once you are logged in, you'll see this screen.
List of prices and the calendar.
Area on form to select "rental" flute.


Thursday, April 18, 2013

Wooden Flute COA

We stopped by the repair shop and found our repair technician, Rachel, working on something a little different -- a Handmade Custom Grenadilla flute.  Not that a grenadilla flute is that unusual, but we see her repairing and adjusting metal flutes most frequently.  This particular grenadilla flute was in for a C.O.A.

So, are there many differences between a C.O.A. on a wooden flute and a metal flute?  Well, not really.  As for mechanics, wooden flutes are currently available only with an offset G and would not have a C# trill -- but those are really the only differences with the mechanism.  Additional adjustments that would be performed with the wooden flute is that the bore is oiled, and the tenon cork is replaced as needed.  When we stopped in to see Rachel, she was in the midst of some small adjustments, including replacing felts and adjusting spring tension.  She had already replaced the tenon cork and was now making minor adjustments to the cork's width.  To do this, she placed the flute on a mandrel, cut a small strip of fine grit sandpaper, and sanded the cork.  Other than tenon corks and bore oil, there really aren't many differences to steps performed in a C.O.A. on a wooden flute.  However, because the body of the flute is wooden, Rachel did mention that it is less likely to come in to the shop with damage to the body -- like small dents and dings that may happen to the body of a metal flute.  That being said, you still want to make sure to protect your wooden flute, even if it's body material is denser and more "ding resistant."  In terms of frequency, you would send in a wooden flute just as regularly as a metal one for a C.O.A, and you should be able to enjoy many happy years with your well-adjusted grenadilla flute!

Replacing a felt.  Same felt that is used on metal flutes.
Trimming the felt.
Checking spring tension.
Making sure to check everything thoroughly.
Making minor adjustments to tension with a spring hook.
Checking newly adjusted springs.
Sandpaper will be used for tenon cork.
Small strip of sandpaper has been cut.
Sanding the tenon cork.
Greasing the cork with some Chapstick.
Cleaning inside the top of the footjoint.
New cork fits perfectly.

Thursday, April 11, 2013

Teacher’s Repair Toolkit

As much as we would like to have everything work perfectly with our flutes all the time, well, you know issues are bound to arise – especially in teaching young students.  We recently caught up with Powell Flutes’ Marketing Manager, Christina Guiliano-Cobas, to talk about what she keeps in her teaching toolkit/emergency bag.  Christina maintains a studio of several younger players, so she delves into the toolkit quite regularly.

What’s in the bag?  Well, as you can see from the photo, she has a nice assortment of items that are handy for fixing small issues with student flutes.  So, let’s take a look at the items and their uses…
  • Band Aids – These are for the teacher and the students!  Students may need them from time to time.  However, when it comes to doing repairs, if you get scratched or poked with springs and screws, these are quite helpful.
  • Chapstick – Chapstick is great for cleaning piccolo corks and keeping them moisturized.
  • Cigarette paper – Great for cleaning pads, but it can also be used for making slight adjustments (small pieces would need to be cut).
  • Small pair of scissors – Great for cutting small pieces of the cigarette paper above, Teflon tape, and other purposes as needed.
  • Tweezers – Tweezers and flute repair go hand-in-hand, because everything is very small!  These are great for picking up bits of adjustment papers and corks, as well as any other small items.
  • Teflon tape – A great substitution for a tenon cork in a pinch, and also very handy in fitting headjoints and footjoints temporarily.
  • Pipe cleaners – Great for cleaning in between keys and even the inside of mechanism tubing.
  • Sharpie marker – Helpful in pointing out anything that really needs attention – especially to show your student what may need to be fixed (i.e. – circling dents).  Sharpie marker also comes off easily with alcohol.
  • Cigarette lighter – Good for heating floated pads when they need to be re-seated.
  • Nail polish – Slight marks can be used to help students properly align the headjoint, body, and footjoint.
Christina mentioned that when problems arise that need a quick fix, she explains the issues with the student.  This helps them understand their flutes and recognize any potential issues.  Because the emergency kit is for emergencies, it is also helpful in showing students what would need to be remedied when they take the flute to the repair shop.  As Christina says, “I always try to make quick repairs a learning opportunity for the student as well.”  Her emergency bag is also quite simple – it’s a Ziploc bag!  Some flutists have bags, some use small boxes…  What about you?  What’s in your repair toolkit?

Thursday, April 4, 2013

Pop Goes the Piccolo

Powell Custom Piccolo

If you’ve been playing piccolo and find that your low register has become weak, what could be the culprit?  Perhaps a leak?  Well, yes, that is often the case when notes suddenly do not speak or become difficult to play.  On the piccolo, a leak could certainly be the issue in this scenario, but it might not be coming from where you think it is…

Here is something to try – take the headjoint off the piccolo, make sure the tenon cork is well greased, and then put the headjoint back on.  Pull the headjoint quickly straight off the instrument.  You may give it a slight twist to assist the process.  Listen for a pop as it comes off the body.  Do you hear it?  If you don’t hear a pop, and you are struggling with the low register, you may not have proper suction between the headjoint and body.  This means that air is leaking from this spot!  Corks can seal air, and there is a cork on your piccolo body tenon.  However, it is more likely that the air is leaking from an improper seal of the metal-to-metal connection.  This connection, specifically, is between the inner sleeve of the headjoint and the metal ring on the top of the body tenon (which the inner sleeve fits into when the piccolo is assembled).  Even if the cork is sealing, and there is no static leak to the outside of the instrument, a loose metal-to-metal fit causes an internal, dynamic leak.  This internal leak saps acoustic energy from the vibrating air column of the bore.

Is this something that can be remedied?  Of course!  In fact, our wood specialist, Tim Burnett, assures us that it is quite an easy fix.  However, this should only be done by a certified repair technician – so don’t try this at home!  The solution in the case of a headjoint that fails the “pop test” is to expand the inner sleeve.  Over time, it can shrink simply from the basic wear and tear of assembling the piccolo.  To expand the inner sleeve, the headjoint is placed on an arbor, and the inner sleeve is expanded ever so slightly.  It’s very similar to the headjoint fitting procedure on a flute headjoint that is too loose, which we visited in the previous post at http://www.repairmyflute.com/2012/09/headjoint-fit.html.

As is the case with many repair issues, a leak in the metal-to-metal connection of the body and headjoint may not be visible to the eye.  However, it is common, easily repaired, and quite detectable through the “pop test!” Give it a try – hopefully your piccolo is popping!

Red arrow points to the inner sleeve.  Yellow arrow points to where the inner sleeve goes into the tenon.
Putting the headjoint on for the "pop test."
Headjoint is on.
Pulling the headjoint off (with a slight twist).
And...
Pop!  It's off, and the air seal is good!