Wednesday, May 30, 2012

Stuck Swab?

Have you ever gotten your swab stuck in the piccolo?  Hopefully, the answer is "no."  Don't let this happen to you!  Piccolos can be a bit of a challenge and can fall victim to the "stuck swab" because of their bore.  The piccolo has a conical bore that tapers down from the top to the bottom.  So, the top is the larger part of the bore, and the bottom is smaller.  To swab your piccolo correctly and prevent getting the swab stuck, you'll want to follow a few simple rules:

1) Always use a piccolo swab.  Do not substitute a flute swab, any other instrument swab, or any type of random cloth.  It is best to use a silk piccolo swab.

2) Thread a small amount of swab material through the "needle eye" of the swab stick.  About two inches max should do.  Do not pull an excessive amount through the eye of the stick.  Also, do not twirl the swab around the stick (this will cause the swab to become bunched).

3) Drop the swab "stick first" through the top of the piccolo (where the bore is larger).  Pull downward until the entire swab goes through the piccolo from top to bottom.

4) Repeat as needed, and you are done!

In the event that your swab becomes stuck, you may risk damaging the piccolo if you try to remove it yourself.  Contact your repair person ASAP, and don't be embarrassed, because it can happen!  The trick is prevention.  Swab properly, and you should be set.

Proper amount of swab to thread
Drop down through top
Pull downward to bottom
Pull swab all the way through
Top of piccolo has larger bore than bottom
Bottom of piccolo
Comparison between top (L) and bottom (R)
Do not twirl swab around stick!
Bunched up swab

Wednesday, May 23, 2012

Tarnish?

Is your flute tarnished?  Ever wonder how to remove the tarnish and bring back the shine?  Well, unfortunately, the only safe way to do this is to send your flute to a repair technician.  As tempting as it may be to want to run to the store and buy some silver polish -- or rummage through your household cleaners -- don't do it!  Applying these polishes to your flute would be extremely detrimental as you risk damaging your pads and causing the mechanism to come out of adjustment.

However, there are some ways to prevent tarnish.  Most of the preventative measures are simple rules of good "flute hygiene" and cleanliness.  Always make sure to swab out your flute after playing.  Also, wipe your flute down to remove finger prints.  A simple microfiber cloth is the best type to use for this.  Unfortunately, some people have very acidic hands, which may become evident with excessive tarnish problems.  In this particular case, preventative measures will help, but you may find yourself sending the flute for cleaning more frequently.  There is always an option to try flutes with different metal content.    If your flute does become as tarnished as the one in the photos below, it is alright -- your repair technician will be happy to bring back its original shine!


Wednesday, May 16, 2012

Flute Pad Choices

Did you know that when you send your flute in for repair at Powell, you have a choice of pads?  There are three types of pads to choose from since today's flute pads may be different from older models.  Current Powell models are outfitted with Straubinger pads, which Powell started using around 1990.  Other pad options are hard pressed felt and soft woven felt.  Construction layers differ in these pads and are described below:

1) Straubinger pad - Plastic base, thin microfiber layer, skin
2) Hard pressed felt pad - Cardboard base, thin pressed felt, skin
3) Soft woven felt pad - Cardboard base, thicker woven felt, skin

L to R: Straubinger, hard pressed felt, soft woven felt
So, which should you choose?  It is really a matter of preference, but our website mentions the following characteristics:
 
*Felt pads: Made of cardboard, felt, and a bladderskin exterior. Softer, not as resonant, but can withstand significant finger pressure.

*Straubinger: Made of plastic, microfiber, and a skin. These are used on all of our new flutes because they are designed to be more stable and resonant. In addition, they give the mechanism a crisp response.

Whichever works best for you and meets your needs as a performer is really the best choice! 


Wednesday, May 9, 2012

C.O.A.?

Ever hear the term "C.O.A." and wonder what that means?  Well, in the flute world, it stands for "clean, oil, and adjust."  It is part of a flute's "regular maintenance" routine and is not the same as an overhaul.  Details of the C.O.A are below:

The Clean, Oil and Adjust (C.O.A.) is intended to keep your flute or piccolo playing at its peak and to extend the time between overhauls. A good rule of thumb is to have a C.O.A. done once a year. At Powell, the price of a C.O.A. is $300.00 for flutes and $225.00 for piccolos; it includes up to three hours of repair time and is warranted for 30 days. Expect to be without your instrument for two weeks while it is being cleaned, oiled and adjusted.
1. The instrument is play tested
2. All pinned sections are taken apart and cleaned
3. All keys are cleaned out and oiled
4. Tarnishield is hand applied to the flute body to remove as much dirt and tarnish as possible without buffing.
5. The keys are reassembled and the instrument is regulated. Minor pad shimming is done if necessary.
6. The headjoint cork is checked and replaced if necessary.
7. The instrument is play tested.
Exclusions: A C.O.A. is much more limited than an overhaul. Complete repadding is not included. Lost key motion is covered, but key side play is not. Removal of dents (if requested) is extra and charged at the rate of $85.00 per hour, (minimum charge $45.00). Pad replacement during a C.O.A. is limited to three pads at an extra hourly charge plus the cost of the pads.
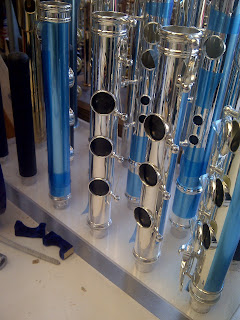
Footjoints during C.O.A. process
Footjoints after keys have been cleaned

Wednesday, May 2, 2012

The Importance of Tenon Fit

We recently spoke with Powell’s Repair Technician, Rachel Baker, about the importance of tenon fit in woodwinds.  According to Rachel, there are three main reasons why proper tenon fit is so critical: (1) creating a proper seal and avoiding air leakage (2) keeping the joints together and fitting properly so that the instrument does not fall apart, and (3) keeping the instrument mechanisms in proper adjustment (particularly with clarinet and oboe bridge mechanisms).

Rachel shared a couple of her tips and tricks for solving tenon fit issues.  For metal tenons that are too tight, she recommends cleaning the tenon (both male and female sections) with alcohol on a clean cloth or Q-tip.  She says not to use any type of grease on metal tenons.  If the metal tenon is too loose, a quick fix is scotch tape.  For loose cork tenons, white pipe threading tape wrapped around the cork should improve the fit.  The various methods mentioned above are, however, temporary.  Make sure to take the instrument to a repair person to remedy tenon fit issues for the long run.  

Flute Tenon CleaningCurious as solutions for a broken tenon, Rachel asserted that a tenon replacement is possible for both plastic and wooden instruments.  Tenon replacement is also available in the case of a tenon that becomes extremely worn.  Having seen metal tenon caps on newer clarinets for instance, I asked Rachel about those as well.  She said that metal tenon caps could certainly be put on the instrument but may be problematic if the wood shrinks due to extreme temperature changes. 

We thank Rachel for her advice on emergency tenon fit solutions!